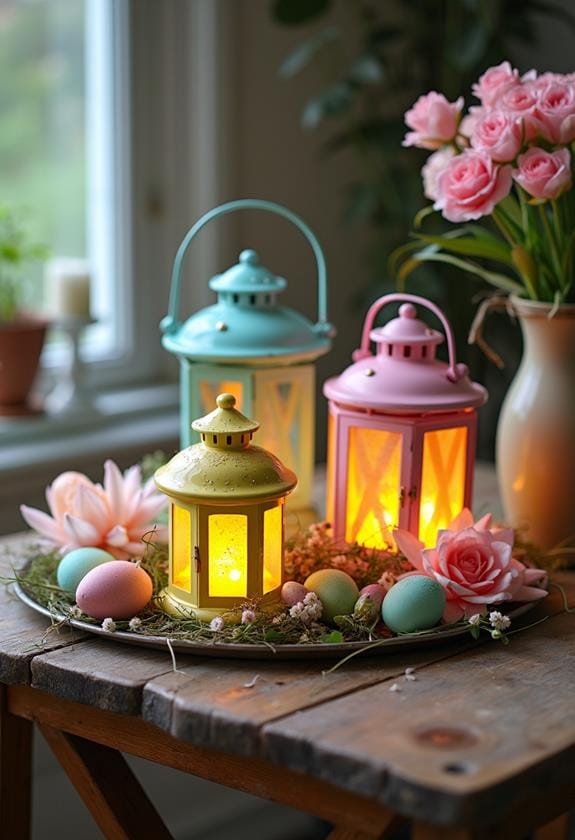
Ready to brighten up your Easter decor? Lanterns are the perfect way to add a warm, festive glow. Start by choosing a lantern that fits your style – rustic Mason jars or sleek modern designs work great. Clean it up, then let your creativity shine! Wrap pastel ribbons, glue on colorful eggs, and nestle in cute bunnies. Don't forget the lighting – battery-operated fairy lights or flameless candles create a magical ambiance. Group them on your mantel or use them as a charming centerpiece. With a little imagination, you'll have a stunning Easter display that'll make your home feel like spring has truly sprung. But that's just the beginning of your lantern adventure!
Design Highlights
- Choose appropriate materials like glass jars, Easter decorations, paint, and lighting elements for your lantern project.
- Clean and prepare your lantern base, applying paint or treatments suitable for the material.
- Add Easter-themed embellishments such as ribbons, eggs, moss, and artificial spring flowers.
- Incorporate lighting elements like battery-operated fairy lights or flameless candles for a magical glow.
- Experiment with creative design variations and strategic placement for maximum visual impact in your home.
Materials and Tools Required
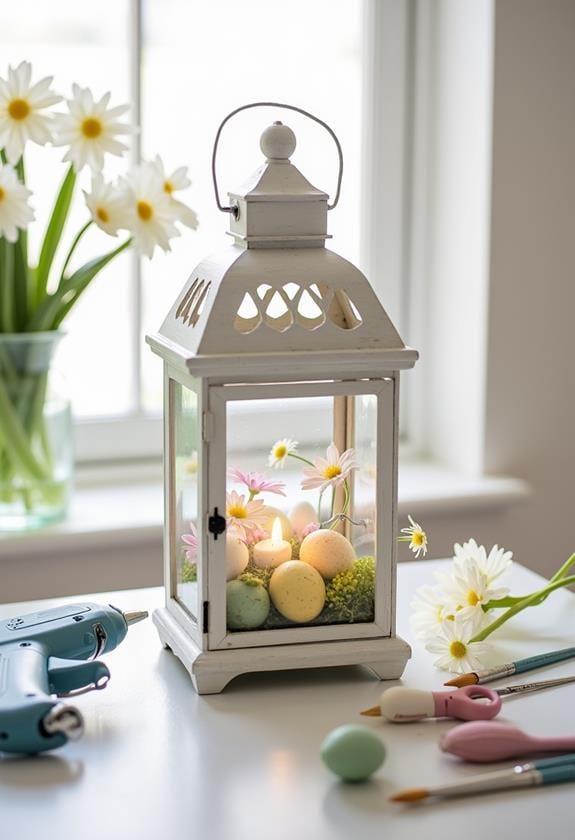
To create beautiful Easter lanterns, you'll need just a handful of essential materials and tools. First, grab some glass jars or lanterns – I love using old Mason jars for that rustic charm. You'll also want some Easter-themed decorations like pastel ribbons, artificial eggs, and cute little bunnies. Don't forget the paint! Acrylic works great on glass. For those looking to add an extra special touch, consider incorporating beautiful lantern decor to brighten up your Easter celebration.
Now, for tools. A hot glue gun is your best friend here. Trust me, it's a game-changer for attaching those delicate decorations. Scissors, paintbrushes, and maybe some wire for hanging – that's about it. Oh, and candles or battery-operated tea lights for that warm glow.
Remember when I tried using real eggs? What a mess! Stick with the artificial ones. They're much easier to work with and last forever. Ready to get crafting?
Selecting the Perfect Lantern
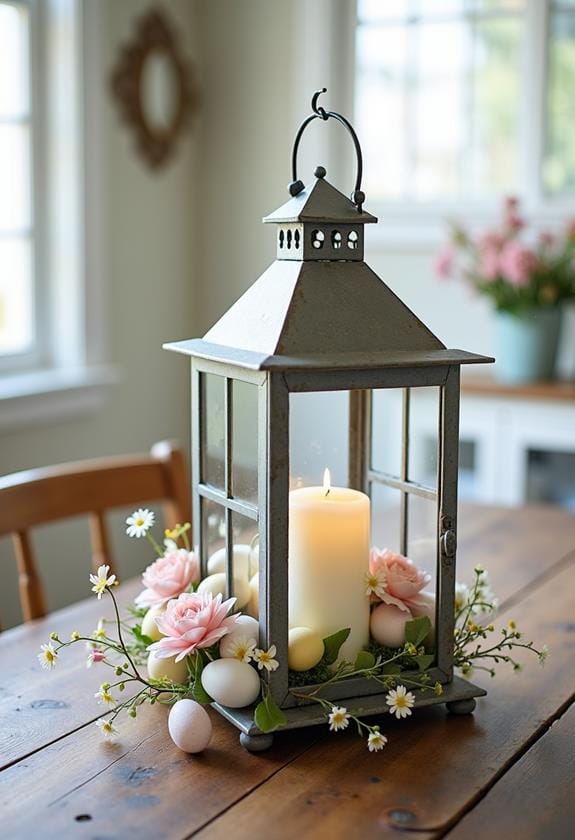
Now that you've gathered your materials, it's time to choose the perfect lantern for your Easter decor. Consider the size of your space and where you'll display it. A large, ornate lantern might overwhelm a small table, while a tiny one could get lost on a spacious mantel. Charming Easter Bunny decorations can complement your lantern choice, adding a festive touch to your holiday celebrations.
Think about your color scheme, too. Do you want a classic white lantern or something more vibrant? I once painted an old brass lantern pastel pink – it became the star of my Easter brunch!
Don't forget about the lantern's style. Rustic farmhouse or sleek modern? And what about the material? Glass allows candlelight to shine through beautifully, but metal can create interesting shadow patterns.
Preparing Your Lantern Base
The foundation of your Easter lantern decor starts with a well-prepared base. You'll want to clean your lantern thoroughly, removing any dust or grime. Trust me, it makes a world of difference! Next, consider the surface. Is it metal, wood, or glass? Each material might need a specific primer or treatment. For metal lanterns, a quick coat of rust-resistant spray paint can work wonders. Wooden bases? A light sanding and some wood stain can give them new life. Beautiful Easter decor can truly transform your church, so taking the time to prepare your lanterns properly is essential.
Now, let's talk about the inside. Are you planning on using real candles or battery-operated ones? If it's the latter, you might want to create a hidden compartment for the batteries. And don't forget about stability! A wobbly lantern is no one's friend. Use some adhesive felt pads on the bottom to keep it steady.
Adding Easter-Themed Embellishments
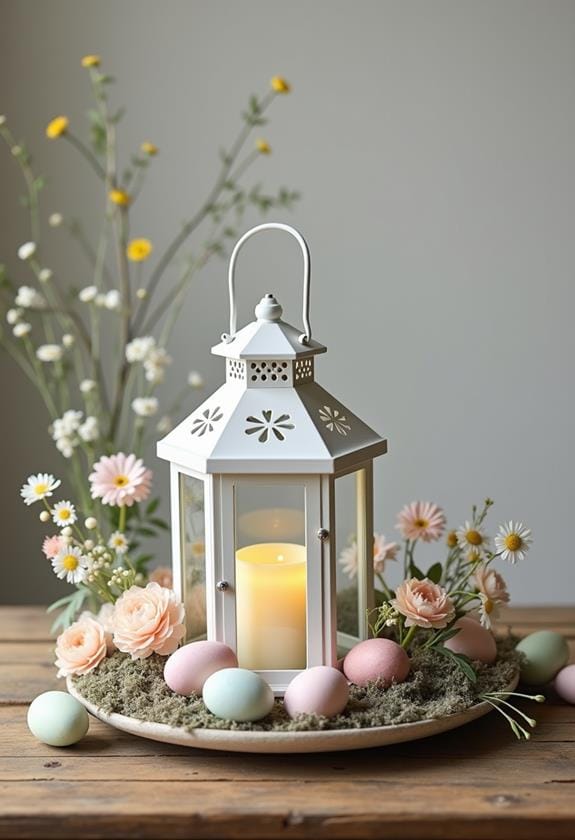
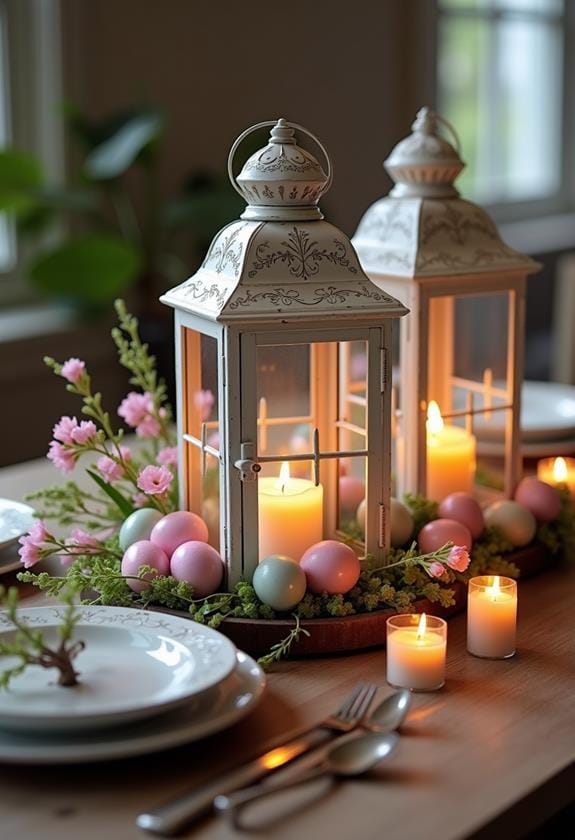
Easter-themed embellishments are what truly bring your lantern decor to life. Let's explore some fun ideas! Why not wrap pastel ribbons around the lantern's frame? Or maybe hot-glue some colorful plastic eggs to the base? You could even tuck in some faux moss for a natural touch. For a festive touch, consider adding Easter window decor elements to complement your lantern display.
And how about those adorable little chicks and bunnies? Strategically place them peeking out from behind the candle. Don't forget the power of flowers! Artificial spring blooms can add a pop of color and freshness.
Want to go for a more elegant look? Try using metallic egg-shaped ornaments or delicate butterfly cutouts. Remember, it's all about creating a balance. Too much, and you'll overwhelm the lantern. Too little, and it might fall flat. Trust your instincts – you've got this!
Incorporating Lighting Elements
Lighting plays an essential role in bringing your Easter lantern decor to life. You've got options galore! Consider tiny battery-operated fairy lights – they're perfect for creating a magical glow inside your lantern. Or why not try flameless candles? They're safe and give off a warm, cozy vibe. Remember when I accidentally set my curtains on fire with real candles? Yeah, let's avoid that drama. Spring window decor can also inspire creative lighting ideas for your Easter lanterns, adding a fresh and seasonal touch to your kitchen.
For a fun twist, how about color-changing LED bulbs? They'll add a playful touch to your Easter display. And don't forget about natural light! Place your lantern near a window to let sunlight dance through it during the day. It's like nature's own light show. Experiment with different lighting options to find what works best for your space and style. Trust me, the right lighting can transform your Easter lantern from cute to absolutely stunning!
Creative Design Variations
Creativity knows no bounds when it comes to Easter lantern designs. You've got the basics down, but now it's time to let your imagination run wild. Why not try these unique twists on the classic Easter lantern?
- Bunny-shaped cutouts: Add some whimsy with adorable rabbit silhouettes.
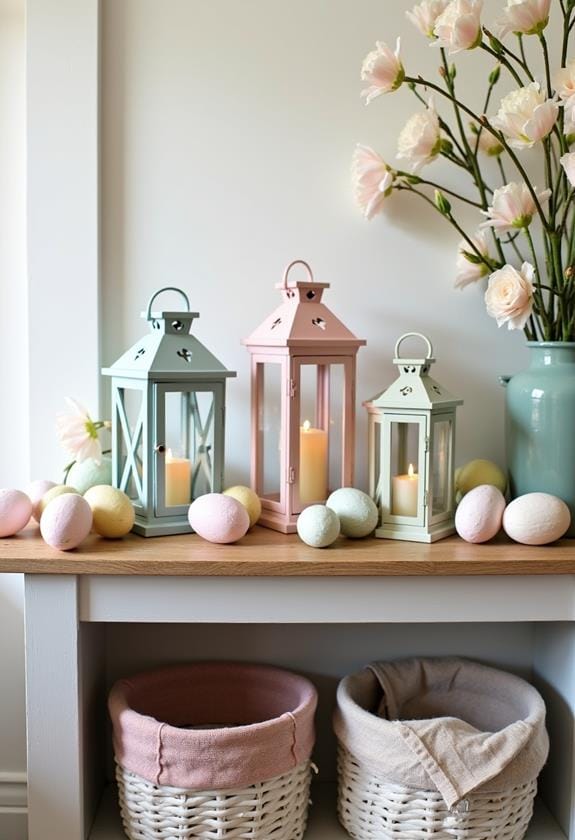
- Pastel ombré effect: Blend soft hues for a dreamy, gradient look.
- Floral wreaths: Wrap your lantern in a ring of spring blooms.
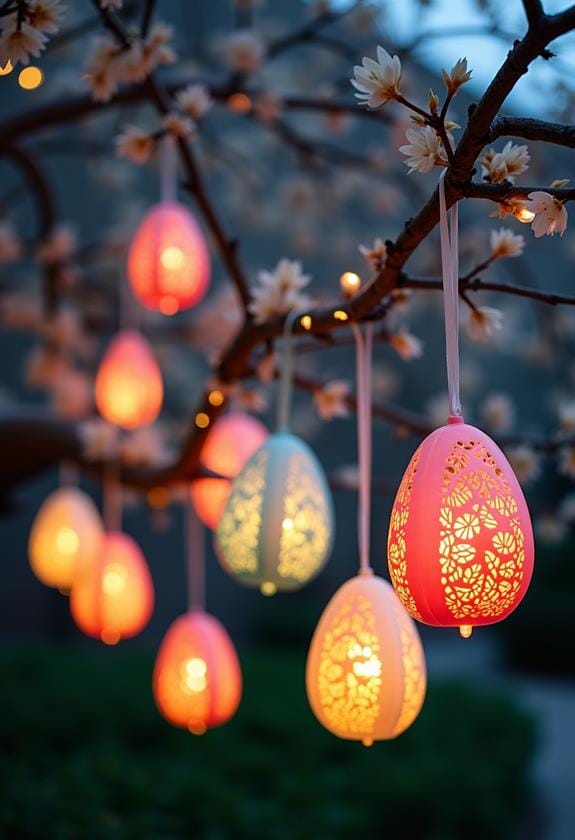
- Egg-shaped lanterns: Ditch the traditional shape for an oval design.
Placement and Arrangement Ideas

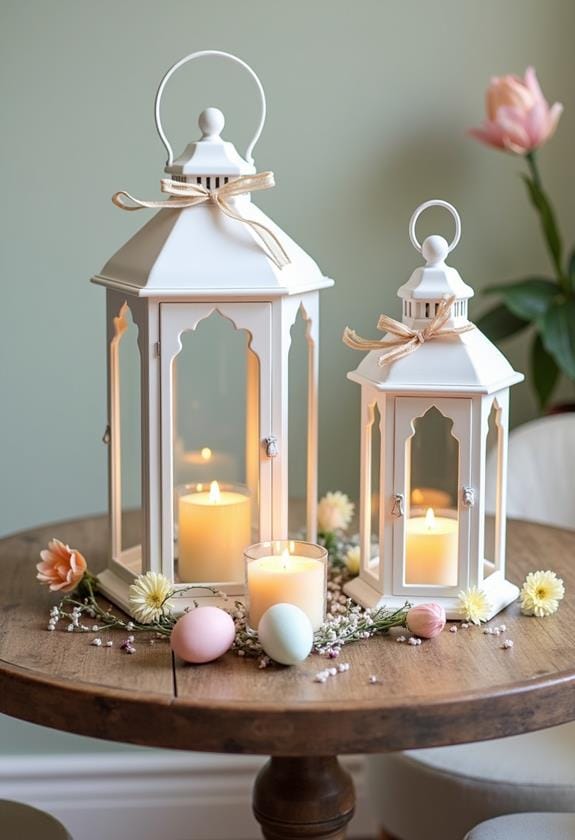
Now that you've crafted your stunning Easter lanterns, it's time to showcase them effectively. Where should you place these little beauties? Well, let's get creative! Try grouping them on your mantel, creating a cozy glow above the fireplace. Or, why not scatter them along your staircase? It'll make heading to bed feel like a magical journey.
Got a dining table? Center a cluster of lanterns as a charming centerpiece. Your guests will be enchanted! For outdoor spaces, hang them from tree branches or line your porch steps. They'll cast a warm welcome as the sun sets.
And don't forget odd numbers – they're design's secret weapon. Groups of three or five lanterns often look more appealing than even numbers. So, ready to light up your home with Easter cheer?
Maintenance and Storage Tips
Your Easter lanterns' longevity depends on proper care and storage. After the holiday, don't just toss them in a box! Give them a little TLC to guarantee they're ready for next year's festivities. Start by gently wiping them down with a soft cloth to remove any dust or debris. If they're looking a bit worse for wear, a quick touch-up with paint can work wonders.
Here are some key tips to keep your lanterns in tip-top shape:
- Store in a cool, dry place
- Wrap individually in bubble wrap or tissue paper
- Use sturdy boxes to prevent crushing
- Label boxes for easy identification next Easter
And remember, proper storage isn't just about preservation—it's about making your life easier next spring. Trust me, you'll thank yourself when you're not untangling a mess of lanterns next Easter!
Frequently Asked Questions
Can I Use Battery-Operated Lights Instead of Traditional Candles?
Like swapping your morning coffee for a smoothie, you can easily switch to battery-operated lights for your lanterns. They're safer, especially around kids and pets. Plus, no more worrying about wax drips or open flames. And hey, isn't it nice to just flip a switch instead of fiddling with matches? Battery lights come in various colors and styles, too. So go ahead, light up your space worry-free. It's a bright idea that'll make your decor glow!
How Long Does It Typically Take to Complete One Easter Lantern?
The time it takes to create an Easter lantern really depends on your crafting skills and the complexity of your design. For a simple one, you might be done in 30 minutes. But if you're going all out with intricate details, it could take a couple of hours. Remember, crafting is meant to be fun, not stressful! So pour yourself a cup of tea, put on some tunes, and enjoy the process. It's your lantern, after all – no rush!
Are These Lanterns Suitable for Outdoor Use?
Are these lanterns suitable for outdoor use? Well, it depends on how you've made them. If you've used weather-resistant materials and sealed them properly, they can be charming additions to your patio or garden. But let's be real – most homemade lanterns aren't exactly built for a hurricane! You might want to bring them in when it rains or gets windy. And hey, who says they can't be indoor-outdoor hybrids? Move them around as you please!
Can Children Help With Making Easter Lanterns?
Kids can have a blast helping with Easter lanterns. It's a great way to get them involved in holiday prep. You can assign them simple tasks like decorating with stickers, applying glitter, or even painting if they're a bit older. Just make sure to supervise and use kid-friendly materials. Who knows? You might discover a budding artist in the family! Plus, it's a fun bonding activity that'll create lasting memories. Why not make it a yearly tradition?
What's the Average Cost to Create a DIY Easter Lantern?
Like a beacon of hope, your DIY Easter lantern won't break the bank. You're looking at about $10-$20 per lantern, depending on your materials. Got some craft supplies lying around? Even better! You'll save a bundle. Mason jars, tissue paper, and battery-operated candles are your best friends here. And let's be real, isn't half the fun hunting for deals at the dollar store? Just don't go overboard – remember, it's about creating memories, not emptying your wallet!